
Your Cheat Sheet To Beating Ultimate Annihilation Colosseum (Colo2)
Introduction
- Dungeon Info (EN): http://www.puzzledragonx.com/en/mission.asp?m=4275
- Leveling Chart by fether: https://docs.google.com/spreadsheets/d/1ljJiE-KUO0dFmBqGtr6YqTIt7Umgq3ZJ53nD5ene7Ro/edit#gid=314798459
This cheat sheet is NOT a definitive guide on Ultimate Annihilation Colosseum and was never meant to be. I wrote this as a lazy player’s preparatory aid for teambuilding; instead of taking the time to decipher the movesets and mechanics by studying dungeon information, you can look at this instead and it should help you focus on what you need to bring.
Ultimate Annihilation Colosseum (Colo2) is a rogue dungeon, which means the stupid rogue leveling system is in effect. This means that all cards in the team start out at Level 1 and level up as you clear each floor. This is important because:
- Not all cards level up at the same rate because of different unit costs and leveling curves, which affects base stats.
- Super Awakening (SA) functionality is greatly limited because the card must be over Level 100 to have access to SA. This means that SB/SB+ SA have zero effect (extremely relevant concern for today’s transform teams), while other SA only come into effect once the card reaches Level 100 within the dungeon.
Team Building
Here’s the stuff that you should probably bring.
Required Tech
- Shield or Dark Damage Reduction: Demonius on F20 has a preemptive 100% gravity; without a shield or a dark damage reduction latent, you’re dead.
- >1.01B Burst Damage: Despharion on F21 has an effective two billion hitpoints and will execute if you hit him below 50% HP, so you need to be able to deal at least 1.01B damage at once. However, I recommend at least 1.5B because odds are that you won’t want to accidentally overshoot while damage controlling (and die). If your team can’t naturally burst for 1.5B damage, then consider bringing a spike and/or applying machine killer latents.
- Fujin/Damage Absorption Void Active: Despharion on F21 puts up a 60M damage absorption shield. Even with twelve pings at 59,999,999 damage, it’s impossible to deal enough damage to kill, so a damage absorption void active (informally known as a Fujin for its progenitor) is required. Furthermore, unless you want to damage control Krishna on F12 (definitely doable), you will need another damage absorption void active unless you plan to stall the number of turns required to recharge the active; this is pretty feasible considering the difficulty of all the spawns between Krishna and Despharion and considering the fact that Despharion is not too terribly difficult to stall. Apply SDRs appropriately; both Rag Dragons on F17 will delay you for six turns after a certain number of turns while Achilles on F19 will preemptively delay you for ten turns. Also, remember that Krishna is quite safe to stall indefinitely on.
- Effective HP > 111,510: The specificity of this number is derived from the magnitude of the largest preemptive strike in the dungeon (from Achilles on F19). Furthermore, having over 111,510 HP effectively (factors in damage reduction from shield) will also allow you to tank most normal hits in the dungeon as well.
- FUA/Auto-FUA: Also required because of Despharion on F21, who will kill you if you try to damage control underneath his resolve threshold, but you should bring anyway for all the other resolve spawns in the dungeon as well.
Recommended Tech
- Awoken Bind Clear: Sarasvati on F7 and Tsukuyomi on F12 have preemptive awoken binds (both five turns). Since Yomi will execute after the five turns are up, I’d say awoken bind clear is pretty useful to have. Furthermore, if you plan to stall on Despharion, a fast awoken bind clear like REvo Diaochan can make life so much easier.
- VDP/Void Damage Void Active: Why is this recommended and not required? Because every enemy that puts up a damage void shield can be damage controlled (or killed before the damage void shield is applied). However, utilizing the Damage Void Piercer awakening or a Void Damage Void active (primarily for rainbow) will definitely make life a lot easier. I recommend the active to have a two-turn effect because it’s extremely convenient, but a one-turn effect is definitely nice to bring along as well.
- RCV Rebuff: Unless you want to stall for ten turns, killing Red Rag Drag on F17 without removing his debuff means Odysseus on F18 will preemptively hit you for 200K, which effectively kills most teams (especially with rogue leveling system in effect). Horus on F5 also uses a preemptive debuff. If you fail to kill Sarasvati on F7 immediately, she will hit with a 99% gravity and then subsequently reduces recovery; however, if Horus’s RCV debuff was already up, Sarasvati will instead hit you. Therefore, bring an active that either debuffs or buffs recovery; buff/debuff doesn’t matter as long as you overwrite the enemy effect. An example of a card with a recovery debuff active that could be extremely useful for this dungeon is Veroah.
- Unmatchable Orb Status Removal Active: Being unable to match part of your board makes the dungeon miserable for most teams and can definitely kill you, especially over time.
- RCV Augmentation: Everything in this dungeon hits really hard, so I recommend strongly that you bring a recovery multiplier via the leader skill(s) or a sub that specializes in RCV with multiple Heal OE awakenings.
Optional Tech
- Hazard Skyfall Overwrite: Really only useful to tech out Zahhak’s poison skyfall effect when you chip him below 50% HP, but can be used for Scion on F2, Wee Jas on F3, and Demonius on F20.
- Time Rebuff Active: There are a decent amount of preemptive time debuffs in this dungeon, and while none of them are particularly dangerous, removing them would certainly make life more convenient. (Think Cronus on F5, Krishna on F12.) Priority varies depending on player skill as well.
- Blind and Cloud Resist: While it is certainly possible to combo out super-blinded orbs and boards with clouds, it is no fun to naturally deal with. Although the need for these resists vary depending on the level of player skill, I would still recommend it to everyone.
- Poison/Jammer/Tape Resist: While all of these are certainly annoying, none are terribly dangerous mechanics (in this dungeon) to the point of being recommended to bring resists. I find poison resistance to be the least useful of this bunch, as you will want to bring recovery augmentation anyway due to how hard everything in this dungeon hits you for. Jammer resistance is extremely convenient to have when stalling on the Rag Dragons on F17 and is useful elsewhere. Tape resistance is most notably useful against Zahhak on F15 and Kurogane Maru on F16.
- Full Board Locking Active: There are definitely a number of annoying spinners in this dungeon; Cauchemar on F14 spawns a nasty formation of spinners. While it is possible to naturally deal with these spinners naturally, a full board lock would definitely make life a lot easier. Other spinner-spawning enemies to note are Arianrhod on F7, Hatsume on F11, and Odysseus on F18.
- Guard Break Awakening: Common to arena-style dungeons are evolution material spawns that have an extremely low amount of hitpoints but ridiculously high defense. Guard Break could be potentially useful for killing off the dublits on F1 without transforming so that the transform card(s) on your team can level ridiculously quickly before transforming (basically, Guard Break allows you to manipulate the rogue leveling mechanic to your favor). This awakening can also be useful for killing the Kingtan on F9, which will deal 198K damage if you fail to kill it.
- Delay: Primarily used against Tsukuyomi on F12 to stall out her ridiculously high combo shield, a delay effect can be useful against other spawns in the dungeon without status immunity shields. Up to eighteen enemy spawns can be delayed.
- [7×6 Board] Leader/Additional Combo Leader: The prevalence of high combo shields throughout the dungeon means that leaders which provide bigger boards or leaders that add combos as an effect of their leader skill will probably have an easier time with the dungeon. This is purely optional and by no means necessary.
- Board/Orb Changers: Many spawns in this dungeon are extremely dangerous, so you will probably want to bring an active that creates a favorable board/favorable orbs in order to activate the leader skill and maximize damage. However, considering that most spawns in the dungeon are stallable, I would say this is less of a priority than some of the other recommended techs.
Floor-By-Floor Breakdown
I will basically summarize each floor’s possible spawns and their relevant move sets. For more specific details, I would click the above link to the full dungeon information on PDX or look at specific spawns’ move sets on Ilmina. Much thanks to both sites for providing me with all the specific details!
Early Floors (F1-F13)
Floor 1 (2 Dub-amelit
 + 1 Dub-topalit
 )
)
- The usual arena-style evolution material spawns that have a low amount of hitpoints but incredibly high defense, each hits for 14K (which totals up to 42K from all three). However, if only one is left, it will enrage (10x ATK). Either be able to bust through 20M Defense or completely bypass it with guard break or even a true damage button. Note that transform cards may have lower cost in their pre-transformed forms, which means that beating the first floor without transforming can allow the card to reach higher levels than if it were transformed on this floor.
Floor 2 (Touen
 / Scion
 )
)
- Touen is a pretty simple spawn that creates 6 Fire, Dark, and Heal Orbs each while putting up a combo shield (absorbs damage if seven combos or below). He does have a large unconditional preemptive strike of 59135, which may be important if you didn’t transform your leader the turn before who would’ve provided an HP multiplier post-transformation. I’ve never really bothered to stall here, but he hits for 40K~65K. Execute at 20%.
- Scion, in my opinion, is undoubtedly the worse of the two, as he hits with a gravity (99%) and then casts a poison skyfall effect (20%) for five turns. The poison skyfall sucks because of how the effect screws the player’s interaction with the spawns on F3. He also has a resolve (75% HP). If you are reliant on the
 FUA awakening but don’t have enough Heal Orbs on the board to make a column, you can stall one turn; Scion will create Heal Orbs for you (provided that you can tank 58K). If you chip him below his resolve threshold, Scion will cast a time debuff for six turns. Hitting Scion to resolve means dealing with a board of Dark Orbs and Mortal Poison Orbs the next turn after tanking a gravity (99%).
Floor 3 (Wee Jas
 / Fenrir
 )
)
- Wee Jas preemptively reduces your time by 75% for one turn, changes Max HP to 1M for one turn, and then makes eight random Bomb Orbs. While the time debuff and the bomb creation are pretty understandable as enemy mechanics, the change to Max HP may confuse you; why would he temporarily increase my maximum health? The answer lies in the way Poison Orbs operate as well as the interaction between this spawn and Scion on Floor 2. Poison Orbs deal damage based on a percentage of Max HP; each combo of three orbs deals damage equal to 20% of Max HP, while every additional linked orb adds another 5%. Normally, a combo of Poison Orbs would only deal damage equal to 20% of Max HP, which is perfectly fine (because 20% doesn’t equal 100%). However, Wee Jas sets your maximum health equal to 1M without changing your current HP. If you accidentally match a combo of Poison Orbs, you would lose 200K HP (which is lethal to most teams). This is important because of the possible poison skyfall effect from Scion on Floor 2, which generates Poison Orbs and thus can be lethal. Fortunately, the poison skyfall effect can be removed by not killing Wee Jas on Turn 1; Wee Jas will then set up a combo shield (seven combos or less) and then cast a jammer skyfall effect (15%) for ten turns, which will overwrite Scion’s poison skyfall effect. Though the Jammer Orbs still create orb troll problems, at least they aren’t directly dangerous to match away/skyfall into. If Touen appeared on Floor 2 instead of Scion, it would be preferable to remove the time debuff and kill Wee Jas on the first turn in order to avoid the jammer skyfall effect.
- Fenrir makes Heal Orbs unmatchable for three turns and then sets up a combo shield (seven combos or less). On the first and second turn, he will hit you with a gravity (99%); on the third turn, he will become enraged (2x ATK). For the most part, Fenrir is a good place to stall out the unmatchable orb status; however, if Poison Orbs are present, it could be potentially lethal as Fenrir is severely reducing HP.
Floor 4 (3 Random Pys)
- Flampy
 /Bubpy
 /Woodpy
 /Shynpy
 /Badpy
 each have 24 HP, 6M Defense, and hit for 46K. Rainbowpy
 has 124 HP, ~26M Defense, and hits for 70K.
Floor 5 (Horus
 / Cronus
 )
)
- Horus preemptively reduces team recovery by 50% and then blinds most of the board with sticky blinds while simultaneously hitting for 74K. Horus also has a resolve }(50% HP); however, hitting him to resolve will only trigger a combo shield (seven combos or less) and a hit for 52K. Not really a spawn to stall on, but can hit up to 74K.
- Cronus starts off with a test, in which he puts up a combo shield (six combos or less) and then reduces time by 75%. Failing triggers an awoken bind (ten turns), while succeeding triggers a damage reduction shield (75% or 4x HP). The easiest way to deal with Cronus is to bring a time rebuff and kill him right away; I would not recommend stalling because he will put up a jammer skyfall effect when chipped below 50% HP.
Floor 6 (Infernodragon Muspelheim
 / Cyberdragon Valhalla
 )
)
- Infernodragon Muspelheim delays actives for three to six turns and puts up a combo shield (seven combos or less). Not very dangerous otherwise, but can debuff team recovery if left alive for long enough.
- Cyberdragon Valhalla blinds half the board with sticky blinds in an annoying pattern and locks all orbs while hitting for 62K. Again, not very dangerous, but can debuff time if left alive long enough and will execute at low HP.
Floor 7 (Sarasvati
 / Arianrhod
 )
)
- Sarasvati preemptively binds awoken skills for five turns and casts locked orb skyfall that lasts for twenty turns. She also has a resolve (30% HP). On the next turn, if not hit to resolve, Sarasvati will hit with a gravity (99%) and then debuff team recovery by 50%. Note that if Horus’s recovery debuff is still active, Sarasvati will hit instead after the gravity. Hitting to resolve is not lethal; Sarasvati will just heal back to full and hit for 55K.
- Arianrhod preemptively creates four spinners in an inconvenient position near each corner of the board. She also has a resolve (50% HP). Unlike Sarasvati, hitting Arianrhod to resolve is (probably) a lot worse because she will recover 30% HP (so the resolve is gone) and casts a mortal poison skyfall effect (20%) for the next five turns. If chipped below resolve, Arianrhod will hit for 67K and cast locked orb skyfall that lasts for ten turns.
Floor 8 (Akechi Mitsuhide
 / Myr
/ Myr
 )
)
- Akechi Mitsuhide preemptively strikes for 57K and delays actives by five turns. The important move comes after killing Akechi, for upon death, he will hit with a gravity (99%) right before fading away. Otherwise, Akechi is as vanilla as they come, with attacks ranging from 38K to 57K as well as the standard execution hit of 236K when below 10% HP.
- Myr sets up a status immunity shield and a five-turn damage void shield (>500K), which basically means that it is impossible to kill her before the five turns are up without some means to bypass the shield (either through the Damage Void Piercer awakening or an active that allows attacks to bypass the shield). Stalling out the shield means being able to tank her moveset: 72K, 81K, Bind (0K), 72K, 90K. Without the shield, Myr is extremely fragile and relatively easy to beat (as compared to the other spawns in this dungeon).
Floor 9 (Kingtan)
- King Flamtan
 /King Bubtan
 /King Woodtan
 /King Shyntan
 /King Badtan
 each have only 90 HP but 10M Defense and will hit for 198K. Not really stallable.
Floor 10 (Wild Drake
 / Susano no Mikoto
 )
)
- Wild Drake preemptively strikes with a gravity (99% HP), then sets up a combo shield (seven combos or less). He also has a resolve (50% HP). Wild Drake isn’t really the best place to stall on because he can delay active skills, but if stalling here, make sure to be able to tank and heal at least 69K per turn. If chipped below resolve, Wild Drake will debuff team recovery by 50% and hit with a gravity (99%) again. However, if hit to resolve, Wild Drake will change the entire board to Fire Orbs and hit for 86K. I wouldn’t recommend hitting to resolve unless a board changer is ready because of the already existing combo shield.
- Susano no Mikoto starts out by setting up a damage reduction shield (95% or 20x HP) that lasts for three turns. Failing to hit below 50% HP means execution. If chipped below 50% HP, Susano will heal back to full and set up a damage void shield (>5M). Keep in mind that the damage reduction shield will still be active for three turns, so if the plan is to hit below half and then kill, make sure to stall out the damage reduction shield first before doing so. Killing Susano no Mikoto outright is also an option to bypass the damage void shield entirely. While Susano can be chipped down to death, his damage thresholds are so low that it may be realistically difficult/impossible to do so.
Floor 11 (Denebola
 / Hatsume
 )
)
- Denebola preemptively hits for 99K. On the next turn, she will debuff time by 50% and enrage. After that, she will hit for 149K every turn. Most teams probably can’t survive that kind of beating, so I suggest to kill her right away.
- Hatsume creates a row of spinners (two turns) in the middle of the board and sets up a combo shield (seven combos or less). If failing to kill Hatsume, she will just create two rows or two columns of spinners (both two turns) and hit for 83K over and over again.
Floor 12 (Krishna
 / Tsukuyomi
 )
)
- Krishna is one of the two spawns that has a damage absorb shield (>8M). He preemptively delays active skills for three to six turns and debuffs time for one turn by 75%. Because of the damage absorb shield, careful damage control or an active is required to kill Krishna; however, Krishna is also one of the best spawns to stall on. Just make sure to be able to tank 58K every turn and deal with Poison Orbs, Jammer Orbs, and/or blinds/sticky blinds. Keep in mind that due to the double consecutive cast of hazards, partial hazard resist is greatly diluted. If damage controlling, keep in mind that Krishna casts unmatchable orb status on two random attributes, enrages, casts a status immunity shield, and will also bind awoken skills for two turns and debuff time by 75% before executing. (Yes, damage control is a viable method, though certainly difficult.)
- Tsukuyomi binds awoken skills for five turns and sets up a combo shield (nine combos or less) for five turns. If failing to kill Tsukuyomi in five turns, she will execute. However, she does not have a status immunity shield, so delaying her until her combo shield disappears is a viable strategy for killing her. Over the first four turns, Tsukuyomi hits for 25K, 49K, 73K, 97K, so if planning to delay, make sure to be able to tank and recover 97K HP. Of course, matching ten combos or more to kill via natural combos, active skill effect, leader skill effect, or combo orbs is also an option.
Floor 13 (Leilan
 / Karin
 / Meimei
 / Sakuya
 / Haku
 / Fagan
 )
)
- This floor of Chinese Celestials is the floor in which the Jewel of Fire/Water/Wood/Light/Dark/Creation drops according to the particular spawn, respectively. None are particularly dangerous, though Leilan does debuff time by four seconds for five turns. Just kill and move on. (If planning to stall, then go read dungeon info, because I have personally never stalled here.)
Void Gauntlet/Middle Floors (F14-F16)
Floor 14 (Cauchemar
 / Neptune
 )
)
- Cauchemar sets up a combo shield (six combos or less) and then throws up a nasty formation of spinners. My advice is to combo along the edge, where the spinners are not present; on a normal board, you can get up to six combos, while on a big board, you can get up to nine combos with this method. Cauchemar hits for up to 68K and can create Poison and Jammer Orbs as well. If he does so, make sure to match away the Jammer Orbs; otherwise, Cauchemar will hit for 135K instead and convert the Jammer Orbs into Wood Orbs. If chipped below 50% HP, Cauchemar will bind three random subs and debuff time by 50% for five turns.
- Neptune preemptively sets up a status immunity shield and a damage void shield (>10M), then delays active skills by three turns and hits for 64K. He also has a resolve (50% HP). From my experience, Neptune is one of the safest spawns to chip down to death because his void shield threshold is pretty high compared to his relatively low health. When above 50% HP, Neptune can hit up to 57K and/or can also spawn Poison Orbs. If Poison Orbs are left on the board, Neptune will default to hitting for 77K while converting the Poison Orbs into Mortal Poison Orbs. If left above 50% HP for at least three turns, Neptune will set up a combo shield (seven combos or less). If chipped below 50% HP, Neptune will put up a damage reduction shield (50% or 2x HP) and debuff time by 50% for ten turns; however, he will make his next move after three turns instead of the usual one. This gives ample time to chip Neptune down to death. If failing to do so, Neptune will execute with a hit for 512K. If hit to resolve, Neptune will just heal 50% of his HP and then set up a bigger damage reduction shield (75% or 4x HP), but will not debuff time.
Floor 15 (Lindworm
 / Zahhak
 )
)
- Lindworm preemptively makes Heal Orbs unmatchable for one turn. It also has a resolve (50% HP). If hit to resolve, Lindworm will heal back to full and swap the leader with a random sub for three turns. When above 50% HP, Lindworm has many different moves it can make; it can cast a void shield (>20M), an absorb shield (>20M), an attribute absorb shield of any one attribute, a combo shield (eight combos or less), or a damage reduction shield (75% or 4x HP). Each shield comes with a hit ranging from 54K to 81K. If hit below 50% HP, Lindworm will strike with a gravity (99%) and delay active skills for zero to seven turns. Lindworm will bind awoken skills for one turn and create spinners in the corners of the board before executing.
- Zahhak preemptively sets up a status immunity shield and a damage void shield (>50M), as well as a combo shield (eight combos or less). If nine combos or more were matched, Zahhak hits 60K; otherwise, Zahhak hits for 108K. The next turn, Zahhak will enrage (1.5x ATK) and then tape the bottom row of the board for five turns. If chipped below 50% HP, Zahhak will cast a poison skyfall effect (20%) for 99 turns. Otherwise, Zahhak hits for 81K~104K and can create Poison or Mortal Poison Orbs. When pushed into execute range, Zahhak will throw up a combo shield (nine combos or less) before executing. An important note is that Zahhak’s combo test in the beginning takes priority over his <50% HP move. If planning to chip him down bit by bit, I would strongly recommend a hazard skyfall overwrite active.
Floor 16 (Moby Dick
 / Kurogane Maru
 )
)
- Moby Dick preemptively casts a giant cloud that is two rows in size over a portion of the board, then sets up a one-turn combo shield (seven combos or less) and a damage reduction shield (75% or 4x HP). He also has a resolve (50% HP). Moby Dick has a set of five moves for the first five turns, all of which include various different clouds and hits ranging from 108K to 122K. There is also a leader swap and a Light Att. absorb shield within the first five turns, but they are not accompanied with direct attacks. After the first five turns, Moby Dick will bind awoken skills for five turns, and then start smacking for 95K to 117K while also making Jammer Orbs. Hitting to resolve or below 50% HP will trigger overriding moves; a hit to resolve means Moby Dick will regenerate 75% of its HP and enrage (1.5x ATK), while a hit to below 50% HP means Moby Dick will cast another damage reduction shield (75% or 4x HP) or will hit normally for 26K if a damage reduction shield is already up and then bind the team leader and helper for three turns. Overall, the severity of its attacks makes Moby Dick an extremely undesirable spawn to stall on. This spawn is also almost solely responsible for the need for the
 Resistance-Clouds awakening.
 - Kurogane Maru preemptively sets up a status immunity shield, a damage void shield (>25M), and a combo shield (seven combos or less), then hits for 104K and tapes the left and right columns for one turn. He has a large and complicated standard set of moves that I won’t dive into (so go look at dungeon information), but know that after the first turn, Kurogane will hit for 63K, create a column of Poison Orbs and a column of Jammer Orbs, and then make Poison and Jammer Orbs unmatchable. Otherwise, his moves randomly vary, with his hits ranging from 52K to 89K and and his moves creating Poison, Jammer, and Bomb Orbs as well as sticky blinds and tape. The important part is that his execute threshold is at 30% HP, which is fairly high, and that he will heal for 30% HP and bind awoken skills for five turns first before actually executing. Also keep in mind that Kurogane will execute every eleven turns, making him arguably the most difficult void spawn to stall.
Bosses/Final Floors (F17-F21)
Floor 17 (Ragnarok Dragon
 / Red Ragnarok Dragon
 )
)
- Ragnarok Dragon is the safer and tankier spawn of this floor, with 1.2B HP and shields that halve damage from cards that are Dragon, God and Physical. Rag Drag preemptively prevents skyfall combos from occurring for ten turns. His normal move is “Catastrophe Sword”, which hits for 81K and then creates Bomb Orbs in a fixed pattern on the board. However, every three turns, Rag Drag will use “Ignition Burst”, which doesn’t hit for any damage but delays active skills for six turns. When at or below 50% HP, Rag Drag will use “Ignite Boost”, which just enrages (1.2x ATK) him. If able to deal to with the continual skill delays and the large hits, Rag Drag is a perfectly fine spawn to stall on.
- Red Ragnarok Dragon is arguably the more dangerous spawn, for while he is not as tanky as his normal counterpart (800M HP), Red Rag Drag hits harder and nastily debuffs team recovery by 50%, which can be lethal (explained later). He also has different shields, which halve damage from cards that are Attacker, Balanced and Devil. His normal move is “Catastrophe Booster”, which hits for 101K and then creates Bomb Orbs in each of the four corners of the board. Similar to Rag Drag, Red Rag Drag will use “Ignition Burst” every three turns, which doesn’t hit for any damage but delays active skills for six turns. When at or below 50% HP, Red Rag Drag will use “Ignite Boost”, which just enrages (1.2x ATK) him. If able to deal to with the continual skill delays and the large hits, Red Rag Drag is a perfectly fine spawn to stall on as well, although the debuff to team recovery may make that exponentially more difficult.
Floor 18 (Odysseus
 )
)
- Odysseus is the fixed spawn of this floor and has a simple, yet annoying set of moves. He preemptively sets up a combo shield (seven combos or less) and a damage void shield (>30M), then debuffs team recovery by 50%. If there is already an existing recovery debuff from previous floors (like from Red Rag Drag on F17), Ody will hit for 203K instead. Other than that, Ody only has one regular move called “Offering to God”, in which he hits for 81K and creates a small random formation of spinners on the board. When below 50% HP, Ody will make one random attribute unmatchable for five turns. The damage void shield has quite a high threshold, so it is most definitely viable to chip Ody down. It also helps a lot that Ody has no execute.
Floor 19 (Achilles
 (10% Invade) / Andromeda
 / Pandora
 )
)
- Achilles is the rare invade of the dungeon (similar to Gaslowe and Fama in AA3 and TA2, respectively) and has a small chance (10%) of appearing on this floor. If he does, Achilles is guaranteed to drop. Achilles preemptively strikes for 112K, creates a rainbow board with all six colors, delays active skills for ten turns, sets up a status shield and then sets up a damage reduction shield (75% or 4x HP) that lasts for five turns. He also has a resolve (50% HP). On the first turn and then every three turns afterward, Achilles will hit for 56K, set up a combo shield, and enrage, as well as cast a hazard or a debuff. The magnitude of the combo shield (seven/six/five combos or less) and enrage (1.2x / 1.5x / 2x ATK) and the type of debuff/hazard used (team recovery debuff / cloud / time debuff) depends on Achilles’s HP (<100% / <75% / <50%) at the time he uses his move. Otherwise, Achilles either attacks with a gravity (25%) or creates sticky blinds and then hits for 56K. Standard execute at 10% HP. Hitting to resolve will make him heal for 75% HP, set up a combo shield (seven combos or less), and then enrage (2x ATK).
- Andromeda preemptively debuffs team recovery by 50% for ten turns, sets up an attribute absorb shield, and then makes one attribute unmatchable; both the shield and the unmatchable orb status last for five turns. If an enemy team recovery debuff is already active, Andro will hit for 65K. While the attributes that are absorbed/unmatchable are random, the unmatchable attribute will always be the attribute that has an advantage over the attribute that is absorbed by the shield. Once five turns have passed (at which the attribute absorb shield and the unmatchable orb status have both disappeared), Andromeda will set up a status immunity shield, delay active skills for five turns, and then set up a damage void shield (>100M). The threshold for the damage void shield is ridiculously high, so it should not be too terribly difficult to chip Andromeda down. Her normal moves consist of hitting for 61K or 65K and either creating a Fire, Water, Wood, Light, Dark, Heal, Poison, and Jammer Orb (eight total orbs changed) or locking ten random orbs on the board. Andro is pretty tanky at 1B HP but otherwise quite easy to stall on. Hitting Andro to resolve will make her enrage (1.5x ATK) and then set up a combo shield (nine combos or less). If able to hit ten combos, hitting her to resolve is probably safe.
- Pandora gives a test as her preemptive move; she sets up a status immunity shield and a combo shield (nine combos or less), binds awoken skills for five turns, then creates 6 Dark Orbs, 6 Heal Orbs, 6 Jammer Orbs, 6 Poison Orbs, and 6 Mortal Poison Orbs. To pass, one must match ten combos (or more). If successful, Panda will buff time (110%) and then set up another combo shield (seven combos or less). If unsuccessful, Panda will bind awoken skills for ten turns and then bind all four subs for six turns. Failure is usually pretty lethal, so I suggest trying to pass. Otherwise, Panda only hits for 76K and does nothing else.
Floor 20 (Demonius
 )
)
- Demonius preemptively creates Bomb Orbs, casts locked orb skyfall, and then strikes with a lethal gravity (100%). He also has a resolve (50% HP). On the first turn, Demonius will use “Energy Ray”, which hits for 99K and fixes starting location on the board to one random orb. This is unavoidable unless Demonius is hit to resolve, at which he will heal for 51% HP and then enrage (2x ATK). If already enraged, then he hits for 99K, so one could technically stall on Demonius if able to hit it to resolve while tanking and recovering from the ensuing hit every turn. Otherwise, when above 50% HP, Demonius will hit for 65K and can either debuff time or delay active skills but will create Bomb Orbs most of the time. When below 50% HP, Demonius will first set up a combo shield (five combos or less) and then cast a jammer skyfall effect (20%) for ten turns. After that (and while still below 50% HP), Demonius can cast the same effects as before but hits harder (79K~104K). Standard execute at 20% HP.
Floor 21 (Despharion
 )
)
- Despharion is the true final boss of the dungeon. He preemptively sets up a status immunity shield, a damage reduction shield (75% or 4x HP), and a damage absorb shield (>60M). The damage reduction shield, in particular, makes him extremely tanky at 2B HP effectively. He also has a resolve (50% HP). If still at full health on the first turn, Despha will reset all active skills and then basically execute (unless team can tank a hit for 180K). The important part about Despha is that he has an execute threshold of 50% HP, which is significant for two reasons. One, it means the resolve cannot be dealt with through damage control. Two, the execute threshold in conjunction with the damage absorb shield threshold prevent Despha from being killed without a damage absorb void active. Otherwise, Despha alternates between two sets of moves. First, he hits for 63K and then binds awoken skills for one turn. Then, he either creates Bomb Orbs or sticky blinds randomly and then hits for 58K or 60K. The premature awoken bind means that without an awoken bind clear, the following hazard creation cannot be resisted.
Sample Builds
Some example builds that have cleared Ultimate Annihilation Colosseum are displayed below with a picture and an explanation. The point is to look at the teams and see the thought process behind how they were built, not to blindly copy them.
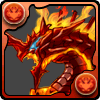
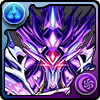
Build 1 – Yugi/Nelle (Template)

Utilizing one of the most powerful leader pairings in the game, Yugi and Nelle combine forces to beat Ultimate Annihilation Colosseum! Since the team is so common (with many slight variations), I’m not going to credit anyone. Here’s what each part of the team checks off.
- Shield (Nelle’s LS)
- >1.01B Burst Damage (Triple Machine Killer Latents on Yugi, Nelle, Dark Magician with VDP + Row of Dark Orbs)
- Fujin/Damage Absorption Void Active (Yugi and Nelle’s AS)
- Effective HP > 111,510 (Yugi and Nelle’s LS → 2x HP for Devil, 2x HP for Balanced + 25% damage reduction shield)
- FUA/Auto-FUA (Yugi’s LS)
- Awoken Bind Clear (REvo Diaochan’s AS)
- VDP/Void Damage Void Active (Yugi, Nelle, Dark Magician with VDP)
- RCV Rebuff (Halloween Bastet’s Inherited AS and Lina Inverse Equip’s Inherited AS)
- Unmatchable Orb Status Removal Active (Mystical Elf Equip’s Inherited AS)
- RCV Augmentation (Yugi and Nelle’s LS → 2x RCV for Devil, 2x RCV for Balanced)
- Time Rebuff Active (REvo Diaochan’s AS)
- Jammer/Cloud/Tape Resist (Inherited Awoken Skills)
- Poison Resist (Yugi’s LS)
- Blind Resist (REvo Diaochan’s Awoken Skills)
- Delay (Dark Magician’s AS)
- [7×6 Board] Leader (Pre-Transformed Nelle’s LS)
- Board/Orb Changers (DMG, Yugi, Nelle, Dark Magician’s AS)
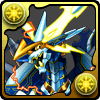
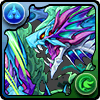
Build 2 – Valentine’s Ideal (By Lumon)

The card that arguably began the revitalization of the rainbow playstyle, Valentine’s Ideal is certainly at the forefront of the rainbow playstyle in NA. Here’s what each part of the team checks off.
- Shield (Valentine’s Ideal LS)
- >1.01B Burst Damage (Machine Killer Latents on Valentine’s Ideal, Core, NY Reeche + Spike Inherit)
- Fujin/Damage Absorption Void Active (NY Reeche’s Active)
- Effective HP > 111,510 (Valentine’s Ideal LS → 4x HP for Dragon or Balanced with 43.75% damage reduction shield)
- FUA/Auto-FUA (Core’s Awoken Skills)
- Awoken Bind Clear (Valentine’s Ideal, Yasha’s AS)
- VDP/Void Damage Void Active (Inherited LFord Card, Base Akine’s AS)
- RCV Rebuff (Valentine’s Ideal AS)
- Unmatchable Orb Status Removal Active (Yasha’s AS)
- RCV Augmentation (Valentine’s Ideal LS and AS → 4x RCV for Dragon or Balanced)
- Hazard Skyfall Overwrite (Inherited Halloween Pumpkin)
- Time Rebuff Active (Core’s AS)
- Blind/Poison/Jammer Resist (Inherited Awoken Skills)
- Cloud Resist (Yasha’s Awoken Skills)
- Guard Break Awakening (Yasha’s Awoken Skills)
- Additional Combo Leader (Valentine’s Ideal LS → +2 Combo Effect)
- Board/Orb Changers (Valentine’s Ideal, NY Reeche’s AS)
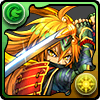
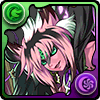
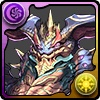
Build 3 – SREvo Leilan/Fasca (By Quan)

Using one of the Chinese Celestials, Quan proves that even sub-optimal and “non-meta” leaders can clear (arguably) the hardest dungeon in the game. Quan is one of NA’s premier top rankers and is always competing for the top three spots in every ranking dungeon. Here’s what each part of the team checks off.
- Shield (Leilan and Fasca’s LS, Inherited Dark Damage Reduction Awoken Skills)
- >1.01B Burst Damage (Quad Machine Killer Latents, Inherited Machine Killer Awoken Skill on SREvo Leilan, Inherited Spike from Glavenus)
- Fujin/Damage Absorption Void Active (Polowne’s AS)
- Effective HP > 111,510 (Inherited Team HP Awoken Skills from Amakozumi, HP+ Latent on Polowne, 1.5x HP for Fire Att. from Leilan’s LS/1.5x HP for Attacker from Fasca’s LS)
- FUA/Auto-FUA (Fasca’s FUA Awoken Skill)
- Awoken Bind Clear (Inherited Aerith Equip, Fasca’s AS)
- VDP/Void Damage Void Active (Fasca’s VDP Awoken Skill)
- RCV Rebuff (Artura’s AS)
- Unmatchable Orb Status Removal Active (Artura, Fasca’s AS)
- RCV Augmentation (Fasca’s 4x RCV for Attacker)
- Time Rebuff Active (Fasca’s AS)
- Blind/Tape/Cloud/Poison Resist (Inherited Hazard Resist Awoken Skills → 40% Resistance to Poison, 100% Resistance to Blind/Tape/Cloud)
- Jammer Resist (Leilans’ Awoken Skills)
- [7×6 Board] Leader (Fasca’s LS)
- Board/Orb Changers (Leilan’s AS)
The Most Important Part
While knowing the dungeon mechanics and consequent team building strategies is extremely useful, the most important part of beating any dungeon is player skill. Knowledge is power, but without the ability to execute, you will still die. If anything, player skill can overcome many dungeon mechanics; for example, time debuffs can be countered with actives but can also be countered with superior skill.
Basically, just get good. 🙂