
Alt. Arena Team with Cate: Yusuke
So by now a lot of people have already found Yusuke being a very powerful leader if not already cleared Alt. Arena with him, but I’d still like to share my team and explain how I decided to minmax it for Alt. Arena, there are a few things that I did to make the team just slightly more consistent, and I would like to share the reasoning behind all the decisions.
 |
 |
 |
 |
 |
 |
 |
 |
 |
 |
 |
|
Choice of badge: 
HP:86675 RCV:13759
![]() x9
x9 ![]() x8
x8 ![]() x9
x9 ![]() x4
x4 ![]() x2
x2
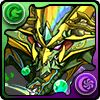
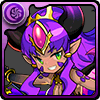
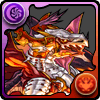
Yang Guifei is being ran solely to kill Hashihime
 , the amount of damage she’s able to output with
  will allow you to potentially kill Hashihime within just 2 turns with a TPA and full muti proc when the 75% shield is down which significantly cut down the amount of actives you need for her. Normally without Yang Guifei your team may have to spend a delay alongside a burst or even a board to kill Hashihime. Another option is to use a 100% shield to tank the rage hit and then slowly grind down Hashihime, but you still have the risk of dropping Hashihime to below 5% HP due to the high defense it has.
Yang Guifei will also take care of Sevenzard
 with ease, further dropping down the need for
 ![]() .
.
The reason why I decided to place Hiko
on Yang Guifei is because Absorb shield null is one of the active you use early on, and after Sopdet
 floor(12) it will have very little effect, so I would always place Absorb shield null active on a card with useful active that I plan on using repeatedly throughout the dungeon. Luckily Yang Guifei’s active is a quad-color board that will guarantee 7 combos and light/blue activation and it is also on a relative short cooldown of 7 which makes her the perfect base to inherit Absorb shield null on.
One thing that I would like to mention about Yang Guifei is that due to her lackluster stat in HP she’s not often ran in other teams such as Edward
 which requires a decent effort in HP stacking because of conditional shield, but she is still a very powerful card that will solve light teams’ problem against Hashihime
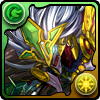
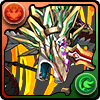
Ideal is superior than other options in a lot of ways, but the reason I ran her is due to the ![]()
![]()
![]() alongside the base active providing a delay which is extremely useful for Sopdet
, Gaia
alongside the base active providing a delay which is extremely useful for Sopdet
, Gaia
 , Noah
 , Hashihime
and the Meta
, Hashihime
and the Meta
 trons
trons
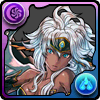
After running my team a few times with ![]()
![]()
![]()
![]() on Ideal I noticed that I don’t really have problems against Dark Kali
on Ideal I noticed that I don’t really have problems against Dark Kali
 or any of the Dragon type spawn, but instead I have problems breaking Light Metatron’s defense when I’m out of actives(Having 1 Yusuke active with no burst which means I need to save it for Kali) and just low damage against Light Kali overall
 , so I changed the latent setup to
 ![]()
![]()
![]() which will allow me to drop Light Metatron’s
HP with just light + blue match with 7 combo and also provide significant damage against Light Kali
which will allow me to drop Light Metatron’s
HP with just light + blue match with 7 combo and also provide significant damage against Light Kali
I decided to place Carat
here because the base active is a situational active with a good portion of the scenario being replaceable by a burst(Pretty much all except Sopdet
) and the Orochi
inherited on top of Paimon
will be charged up before Carat does, so I’m always going to have a delay option available.
There are a lot of discussion about Paimon
vs. Amatsu
 but my decision is based on Paimon’s
 ![]()
![]()
![]()
![]() being able to push Ideal
being able to push Ideal
 and Yang Guifei
 over the defense and make significant damage.
There is nothing wrong with Amatsu
, but there are a lot more that Paimon
can offer. While there is a difference in HP(1644 difference and 3699 after factoring in leader skill), the amount isn’t significant to drop you below any threshold so I deem this difference to be insignifcant. Amatsu has ![]()
![]() whereas Paimon does not but it only makes a difference when there is a bind exactly when you need
whereas Paimon does not but it only makes a difference when there is a bind exactly when you need ![]() , this situation may happen on a few floors such as Thoth
, this situation may happen on a few floors such as Thoth
 on floor 12, Deightros
 and Ninegaruda
 on floor 17 and Divine Queen Hera
 with Hera-Is
 where only Divine Queen Hera’s bind come as preemptive, the rest comes as conditional. Divine Queen Hera will do a 99% gravity before execution, so the resolve is just there for decoration and the next floor is Meta
trons
so you can just ignore the resolve from DQH. Aside from DQH, Thoth’s rage hit is a mere 66256; Deightros’ bind only comes when it is under 50% HP, and I’d utilize delay against it rather than using
where only Divine Queen Hera’s bind come as preemptive, the rest comes as conditional. Divine Queen Hera will do a 99% gravity before execution, so the resolve is just there for decoration and the next floor is Meta
trons
so you can just ignore the resolve from DQH. Aside from DQH, Thoth’s rage hit is a mere 66256; Deightros’ bind only comes when it is under 50% HP, and I’d utilize delay against it rather than using ![]() ; Ninegaruda’s bind only comes if you survive its rage hit, and if you do survive it the resolve wouldn’t matter either, and that’s how I came to the conclusion that
; Ninegaruda’s bind only comes if you survive its rage hit, and if you do survive it the resolve wouldn’t matter either, and that’s how I came to the conclusion that ![]()
![]() is a irrelevant addition and it really brings very little value if not none.
is a irrelevant addition and it really brings very little value if not none.
Paimon’s ![]()
![]()
![]()
![]() will amplify the team’s damage by roughly 20%, in cases where spawns have high defense it will be much more helpful than having damage spread out. This happens on Hashihime
, Deightros
, Meta
trons
and to an extent Noah
and Sevenzard
as well. Paimon will be generating significant damage by piggybacking on Yang Guifei
and Ideal
while Amatsu’s damage will be blocked by the high defense they have.
will amplify the team’s damage by roughly 20%, in cases where spawns have high defense it will be much more helpful than having damage spread out. This happens on Hashihime
, Deightros
, Meta
trons
and to an extent Noah
and Sevenzard
as well. Paimon will be generating significant damage by piggybacking on Yang Guifei
and Ideal
while Amatsu’s damage will be blocked by the high defense they have.
Some aruge that Paimon
will break the activation for Yusuke’s
 leader skill but in reality you will always hold for the inherited skill and not use Paimon, you will only use Paimon’s active where you really need heal orbs and have none, in this aspect Paimon will at least gaurantee heals whereas Amatsu
cannot. The other perspective is that Amatsu’s base active actually being useful, but in reality it only generates blue orbs and so in turn it will not really able to provide much damage aside from about 5m blue damage for every 3 blue orbs that the active is able to generate (calculated at 7 combos). I can wager that mere amount will not help you in anyway whereas you can gamble and have the potential to generate 40m light damage if Paimon active doesn’t break active. The only situation where Amatsu will make a difference is when you encounter Ninegaruda
. In a situation where you don’t have enough heal orbs to make a
leader skill but in reality you will always hold for the inherited skill and not use Paimon, you will only use Paimon’s active where you really need heal orbs and have none, in this aspect Paimon will at least gaurantee heals whereas Amatsu
cannot. The other perspective is that Amatsu’s base active actually being useful, but in reality it only generates blue orbs and so in turn it will not really able to provide much damage aside from about 5m blue damage for every 3 blue orbs that the active is able to generate (calculated at 7 combos). I can wager that mere amount will not help you in anyway whereas you can gamble and have the potential to generate 40m light damage if Paimon active doesn’t break active. The only situation where Amatsu will make a difference is when you encounter Ninegaruda
. In a situation where you don’t have enough heal orbs to make a ![]() but have the light orbs, Amatsu active will allow you to break through the situation but the inherit setup will have to be rehauled for that to happen since Orochi
will always be saved until Hashihime
which is the floor right before.
but have the light orbs, Amatsu active will allow you to break through the situation but the inherit setup will have to be rehauled for that to happen since Orochi
will always be saved until Hashihime
which is the floor right before.
I decided to inherit Orochi
over Paimon because it is the base active that I will least likely going to use just so I can charge up Orochi without worry.
The latent ![]() is only to help against Sopdet
, the damage is as the following table. While Sopdet is light, I go with 4 combo, and when it’s in dark I go with 2 combo.
is only to help against Sopdet
, the damage is as the following table. While Sopdet is light, I go with 4 combo, and when it’s in dark I go with 2 combo.
|
|
|
|
 |
|
|
| 3 Light 3 Blue no enhanced orb; 4 combo | 85472 | 56600 | 96906 | 56363 | 65981 | 85472 |
| with |
85472 | 56600 | 96906 | 84545 | 65981 | 85472 |
| with 3 enhanced light and 3 blue orbs; 2 combo | 86466 | 57263 | 98031 | 85520 | 66756 | 86466 |
| with 3 enhanced light and 3 blue orbs; 4 combo | 121059 | 80156 | 137225 | 119729 | 93444 | 121059 |
Why the even number on combos?
Because when you match odd number combos you will have a bump of 3 orbs on one side, it will have a slightly more chance for skyfall combo, the chance is very small but I prefer playing it safe when I don’t need to risk for the extra damage.
Yuna is the most important sub on this team due to her relatively short cd shields. With her 50% shields, the team will only need 72593 HP to tank all preemptive damage. Her ![]()
![]()
![]()
![]() also contributes greatly with Ideal
bringing none.
also contributes greatly with Ideal
bringing none.
I decided to do Reincarnated Indra
over regular Indra
 because of the shorter cooldown, realitstically a one turn 75% shield is all I will need, but 2 turns gives me the flexibility in case I screw up and the cooldown is not extremely long either.
The ![]()
![]() on her is important to charging her active back up. The first active skill usage will be at floor 4 to block the 90% gravity and makes the stalling smoother, the second usage will be at the end of floor 12 for Goemon
on her is important to charging her active back up. The first active skill usage will be at floor 4 to block the 90% gravity and makes the stalling smoother, the second usage will be at the end of floor 12 for Goemon
 then the third usage will be at the end of f16 or f17 for either Lifive
 or DQH
if not both. Between floor 4 and floor 12 there’re the latent Tamadras on floor 5 which guarantees to delay 3 turns and the Dimen
or DQH
if not both. Between floor 4 and floor 12 there’re the latent Tamadras on floor 5 which guarantees to delay 3 turns and the Dimen
 sion
sion
 dragons
 on floor 7 which will delay from 0~2 turns. During these floors it’s not as big of a deal since you will be stalling on floor 4 and come out with skill fully charged. Between floor 13 and floor 16 there is Whaledor
 that preemptive delays for 5 turns, Shiva
 that preemptive delays for 2~5 turns and Kagutsuchi
 that preemptive delays for 0~7 turns. Most of the stalling will be done on floor 16 with Camael
 , Ibaraki
 and Hashihime
but it helps with any of the turns that you will be able to charge up before floor 16.
and Hashihime
but it helps with any of the turns that you will be able to charge up before floor 16.
With a team that does over 57m damage on 1 light 1 blue 7 combo I have the leisure to put any killer latent I want, and since Ideal already provided a huge amount on Light Kali
I decided to compensate the dragon damage with Yuna with ![]() to roughly balance the output on Kalis.
to roughly balance the output on Kalis.
There isn’t much I can talk about the leader skill, they are pretty straight forward, one thing I can mention is that it has poor scaling so if you end up on Ninegaruda
without enough heal orbs for ![]() you will unlikely have a way out.
you will unlikely have a way out.
Yusuke’s base active is very strong, it will generate enough damage to drop Kal
is
below danger zone easily if not provide enough to just one shot Dark Kali, and since this active is important late into the dungeon, I would inherit actives that I would usually use in the middle of the dungeon so Yusuke gets charged up again when I reach Meta
tron
and Kali floors.
I decided to go with Base Nene
inherit as a counter to Dark Izanami
 and use the following floor(14) as a stall point
to stall out the TE debuff.
To be quite honest, the inherit on friend Yusuke is not quite optimized to do anything, there are certainly things that I could do to utilize the slots better but that’s something I’ll address in a later section.
The latent was originally ![]()
![]()
![]()
![]() but after running the team a few times I realized I don’t really need the
but after running the team a few times I realized I don’t really need the ![]()
![]() so instead I replaced them with a
so instead I replaced them with a ![]() to help against everything on floor 19 and 20 and most importantly it doesn’t push Yusuke’s damage over Sopdet’s
absorb shield.
to help against everything on floor 19 and 20 and most importantly it doesn’t push Yusuke’s damage over Sopdet’s
absorb shield.
For the friend Yusuke there wasn’t much I could do but to just pick a friend that fits the best with my team, and there goes that.
One thing that I do want to mention about friend Yusuke is that if you don’t plan on stalling on floor 4(the dr
 ago
ago
 nb
nb
 ou
ou
 nds
nds
 ) then you will not want as many
 ![]() ,
, ![]() or
or ![]() on friend Yusuke due to the potential overshoot on Starling
on friend Yusuke due to the potential overshoot on Starling
 which cause it to do Blue/Poison bicolor board while hitting for 60390
There are only a few problem with this team as it stands. As it is built out of my box there are just some options that I don’t have.
- Hera Sowilo’s awoken skill bind into leader binds.
- Damage on Dark Kali is dangerously close to dropping it to just under 5%
- Ninegaruda will be reliant on natural board having 5 heal orbs
To solve Hera Sowilo’s problem I either need to have a 7+ turn Awoken skill unbind active anywhere on my team, or I have to have a 10+ unbind on one of my sub. The reason I did not run Odindra
 on the team is because all other awoken bind is stallable for my team and running Odindra will only further cripple my team more than help in the 10%(1/5 in getting Sowilo and 1/2 in getting leader binds) situation. One of the better option would probably be inheriting Sakura
 somewhere on the team, it could be on any slot except Yuna
due to how I will be using her active throughout the dungeon to tank preemptive damage thus won’t be able to get the inherit up. I will most likely place Sakura on Paimon
and move the Orochi
onto one of the Yusuke
instead. Another option is is Amamiya Ren
somewhere on the team, it could be on any slot except Yuna
due to how I will be using her active throughout the dungeon to tank preemptive damage thus won’t be able to get the inherit up. I will most likely place Sakura on Paimon
and move the Orochi
onto one of the Yusuke
instead. Another option is is Amamiya Ren
 which is a bit inferior due to the side effect being only 1 turn delay. Ren will still serve the purpose to just delay Gaia or Noah and be short enough to be charged up before floor 18(Hera floor).
The damage with a even split on Yusuke board generates 191m damage against Dark Kali
assuming none of the enhanced orb landed on a light orb. However this is a simple fix where you can turn a perfect 10c board into 8c and the damage will drop to just roughly 130m instead, and if any of the enhanced orb landed on light orbs, the 10c setup would kill without any problem.
The problem with Ninegaruda
is that Yusuke cannot damage control to reliably drop it to under 50% without killing(Need 3 matches of 3 light orb with 7 combo to do so) so it will rely on natural board giving 5 heart orbs alongside 3 light and 3 blue orbs. There are a few options that I can do to tackle this situation: One is to bring an active that unlocks the board and bring active that generates light, blue and heal orbs, but currently that active does not exist and we only have Amatsu
and Pixel Y’Shtola
 that unlocks the board and generate blue and heal orbs. The flaw with this solution is that without light orbs on board you will still die so in the end it’s not a very good solution and even if does do the job it is still not useful for any other situation. Option two is to bring a shield and tank the rage hit, but the problem with this is that Ninegaruda’s rage hit sits at 443340 damage and not even a 75% shield will allow you to survive so the only way out is a 100% shield, however at floor 17 it is very unlikely that you still have any inherits saved that isn’t for Metatron or Kali so one of the option that really stand out is Takuma
 from KoF collab. His active nullifying damage will allow you to ignore the rage hit from Ninegaruda and in the case you didn’t get Ninegaruda spawn you can still use Takuma active for Metatron or Kali. The trade off is that this burst will only work for one turn which means you may have to rely on having another active to guarantee killing.
So how would the team look like after these modification? Probably like this:
|
|
|
|
|
|
|
|
|
|
|
|
|
HP:89012 RCV:14135
![]() x9
x9 ![]() x8
x8 ![]() x9
x9 ![]() x4
x4 ![]() x2
x2
Floor 1,2,3:
Nothing important
Floor 4:
On first turn DPS down everything without FUA
, if Sakura is not up then use Yuna
to preserve health from 90% gravity from Flanje
all while doing one combo to kill the other dragonbound. From that point on match your orbs in blobs and prevent comboing, Flanje will cycle between 2 moveset, 1.Hit for 28000, 2.Heal itself for 50% which makes her the perfect stalling spot. After charging up all the skills, proceed to next floor.Floor 5:
Nothing important
Floor 6:
Will need to used Nene
to kill Nobunaga
Use your absorb shield null in case of Starling
, one light one blue with 7 combo will be all you need due to the amount of In case of Folklore
 preserve all heal orb until you’re really about to die, and just stall out the awakening bind duration.
Floor 7:
Do not try to kill Takeru Dragon
without FUABoth Wadatsumi
and Yamatsumi
dragons are free to kill without FUAFloor 8,9,10,11:
Nothing important
Floor 12:
For Sopdet
follow the table listed from Paimon explanation, it is safe to go up to 3 enhanced light + 3 water orbs with 6 combo while Sopdet is in light and up to 3 enhanced light + 3 water orbs with 2 combo while in dark, having 0 enhanced light will allow you to go up to 4 combo while 1~2 enhanced light will only allow 3 combo. While still in light it is best to put in a few dark or green combo to help.Thoth
is stallable in case Nene
has been used on Nobunaga
, it is not very tanky so the stall is not very reliable.Don’t forget to use Indra
or Yuna
entering the next floorFloor 13:
For Gaia
use Orochi
and stall out the delayed turnsFor Noah
also use Orochi
and just DPS as much as you canFor DIzanami
use Nene
to gaurantee kill with FUAFor LIzanami
 stall out the bind/skill bind, just make sure to clear all jammers without doing significant damage, once all binds are out you can just kill it.
For Goemon
stall as many turns as you can just keep killing it without FUAFloor 14:
For Drahklist
 if you cannot kill on the first turn, you can stall the first 2 turns since it’s 99% gravity into superblind with no damage.
For Whaledor
you will need to 8 combo if you only have 3 enhanced light orbs, 9 combo if you only have 2/3 enhanced light orbs. If you have 4 light orbs with at least 1 enhanced you will only need 7 combo.Raguel
 Stall out the awakening bind and then kill.
Floor 15:
You can just kill Shiva
but keep in mind there is a potential 53000 preemptive damage coming right after, so try to heal up as much as possible.Parvati
 is going to be your stalling floor, use it to stall up all the actives and then proceed with a board that allows you to use absorb shield null active alongside FUA
Floor 16:
Camael
is straight forward, stall out the awakening bind and just full combo the board while matching all the bombs and then kill with fuaFor Ibaraki
use a board active unless the random board he gives you have at least 7 heal orbs and can make 7 combos. If board has 7 heal orbs and provides at least 7 combo, match all the mortal poison together and make a 3/4 heal match, it will put you at enough HP to withstand any of his moveset assuming you came into this floor with full HP(Note coming into this floor from Lakshmi
 is not full HP).
For Hashihime
full combo the boards while storing heal orbs until you need it, wait until the 75% shield is about to wear off then use Orochi
. Save light orbs and once the shield is off Yang Guifei
will do enough to kill it. If you need to use delay early due to no heal orbs it is also acceptable, it will just make storing light orbs slightly harderIf you need to use Yuna
to survive Lifive preempt damage then do soFloor 17:
Ilsix
 can be stalled on indefinitely, just need to kill him every turn without FUA
For Deightros
if you still have delays available you can just use it on him, wait til the 75% shield is about to expire and then use delay. If not you will need to use the burst on it.For Ninegaruda
as mentioned earlier, using Takuma
on first turn will eliminate all threat Ninegaruda can provide. Just don’t drop it between 1% and 20% HP.Don’t forget to use Yuna
entering next floorFloor 18:
DQH
, Hera-Is
and Hera-Ur
 don’t have a resolve move so it’s safe to kill them without FUA
For Hera-Beorc
 as hectic as it sounds you will probably need to keep stalling until you have stored 9 light orbs and just make use of VDP
For Hera-Sowilo
 use Sakura
right away. You can kill it without FUA
use Sakura
right away. You can kill it without FUAFloor 19:
If by now you still have your delay, it’s the time to use it. Spend first turn clearing out red, green, dark and heal orb. If done correctly it should always guarantee you to one shot, Light Metatron
will take 3+3 light orbs with 3 blue orbs and 7 combo to kill, Dark Metatron
will require 3+3+3 light orbs with 3 blue orbs and 7 combo to kill. If both Yusuke
actives are up then just use one, if you have one Yusuke and one Takuma
then use the Takuma here. Sakura
will also allow you to tank one turnFloor 20:
Use your actives, both Sakura
and Takuma
will allow tanking a turn. Yusuke
active will very likely one shot if not drop Dark Kali
very low and will leave Light Kali
at about 30%~50% HP

Edward being machine type allows him to take ![]() which can allow him to kill Hashihime
alongside his active. He is a usable replacement however his active is 20 CD and not building the team around
which can allow him to kill Hashihime
alongside his active. He is a usable replacement however his active is 20 CD and not building the team around ![]() really limits his active usage. Note that he does have poor HP.
really limits his active usage. Note that he does have poor HP.

Yomi is one of the better replacement. ![]() will further enhance the damage from the rest of the team, balanced typing allows her to work against Hashihime
as well. Yomi’s active can solve a few issue such as Dizanami’s
time reduction or it can just provide power by enhancing the board but overall it is not as useful as a board active. If I run Yomi, I’d take the
will further enhance the damage from the rest of the team, balanced typing allows her to work against Hashihime
as well. Yomi’s active can solve a few issue such as Dizanami’s
time reduction or it can just provide power by enhancing the board but overall it is not as useful as a board active. If I run Yomi, I’d take the ![]() super awakening to prevent locked orbs and just have an extra 1.5x against Hashihime
super awakening to prevent locked orbs and just have an extra 1.5x against Hashihime

JP exclusive, mediocre HP but strong in all other aspect. Similar to Yomi, ![]() will enhance the rest of your team, and him being balanced type allows him to work against any spawn. His active cooldown is short at 6 cd that can improve damage by generating orbs, clearing hazards or just getting rid of TE debuff. His
will enhance the rest of your team, and him being balanced type allows him to work against any spawn. His active cooldown is short at 6 cd that can improve damage by generating orbs, clearing hazards or just getting rid of TE debuff. His ![]() will also boost the RCV of the team greatly allowing your team to stall much easier. Similarly to Yomi, I would take
will also boost the RCV of the team greatly allowing your team to stall much easier. Similarly to Yomi, I would take ![]() as the super awakening.
as the super awakening.
A decent sub in its own right, having another bicolor board as base active is very helpful for later floors. Balanced typing allows him to take any latent killers however you will probably still dedicate one of them with ![]()
![]()
![]() just for Hashihime
and even then you might still end up needing to use an active for it.
just for Hashihime
and even then you might still end up needing to use an active for it.

Tachibana have horrendous HP and RCV but to back that up she has a very useful 75% shield built in the active skill. Her latent killer options aren’t stellar, the best option is probably going with ![]()

Erika does similar things to what Ideal
is doing, high damage to break through Meta
trons
defense and delay active are their most significant trait on this team. Something to keep in mind is that Erika does come with a lot less HP/RCV and her active also breaks activation.

Like stated above its active can be used against Ninegaruda
to somewhat increase consistency however the inherit setup will need to be modified so that its skill can be charged up before entering that floor. Its ![]()
![]() is somewhat meaningless due to bad typing and poor attack, his damage more or less will be insignificant throughout.
is somewhat meaningless due to bad typing and poor attack, his damage more or less will be insignificant throughout.
I realize there’re a lot of FUA![]() options out there but none really significant enough to outshine either Paimon
or Amatsu
, so I’m just not going to mention them, they will all provide FUA for you and that’s all that matters
options out there but none really significant enough to outshine either Paimon
or Amatsu
, so I’m just not going to mention them, they will all provide FUA for you and that’s all that matters
Note: While making changes to the team you will still want to keep your HP just above 77700 so Lifive
preempt doesn’t kill you all the time
So overall Yusuke team is very consistent, I just went through some of the more problematic spawns and try to fix my teams to better counter them, obviously it is not perfect as of yet but these are some info that should be helpful to you if you’re looking to do Alt. Arena with him in the future.
For Alt. Arena general tips and stuff you can see here
If you have questions and concerns feel free to drop them below in the comments!